How to Create an eBook in Canva
If you’re getting started selling digital products, you’ll want to know How to Create an eBook in Canva (aff)! And if you’re savvy, you can even learn how to create an eBook for FREE!
Table of Contents Show
Create a Canva account (It’s free!)
First, go to Canva and create your free account. But I highly recommend upgrading to the Pro version! You get access to having
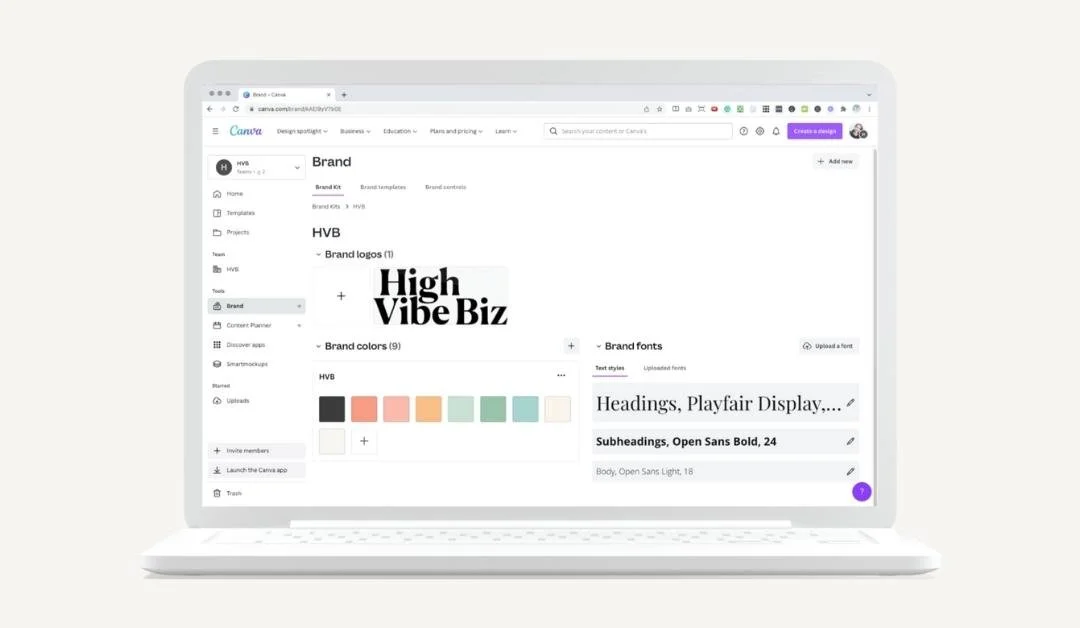
A brand kit - which means you can pop all of your brand colors and fonts into one place, making it super easy to design for your business
Background remover so your pictures will stand out
Magic resize so you can instantly create assets for whatever social media channels you want
But most importantly 1 TB of cloud storage! Super helpful
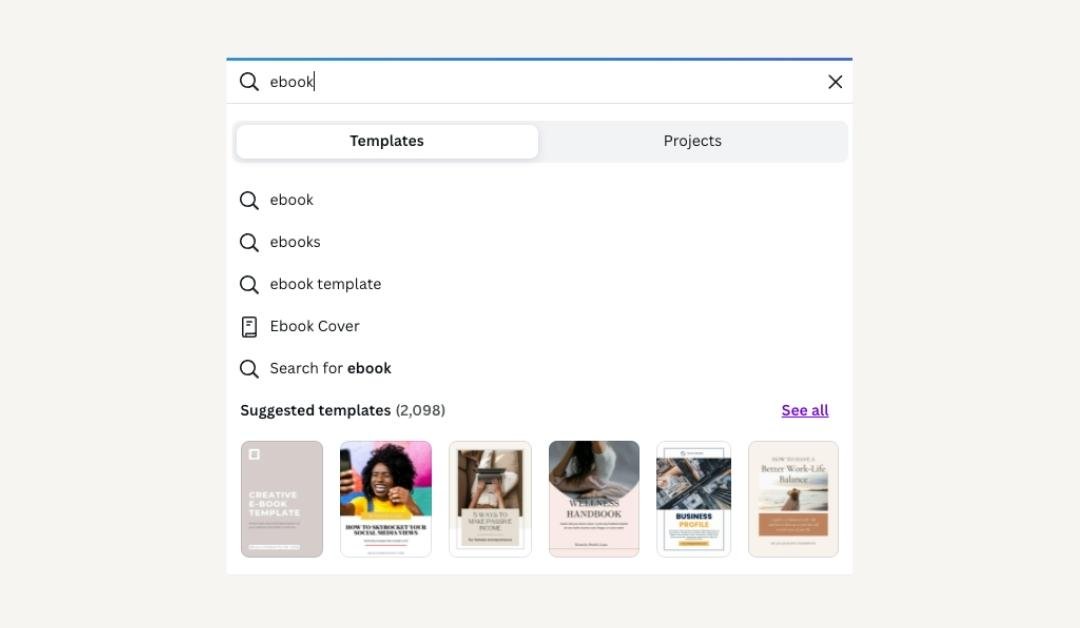
Search for eBook Templates
You can get free eBook templates on Canva or buy templates on Creative Market. I use and continue to use Creative Market because they constantly release new templates that are top of the line!
But if you’re trying to save a few bucks search through Free Canva Templates!
Using the search bar: search “eBook,” and watch all the eBook templates populate!
Choose a Canva eBook Cover Template
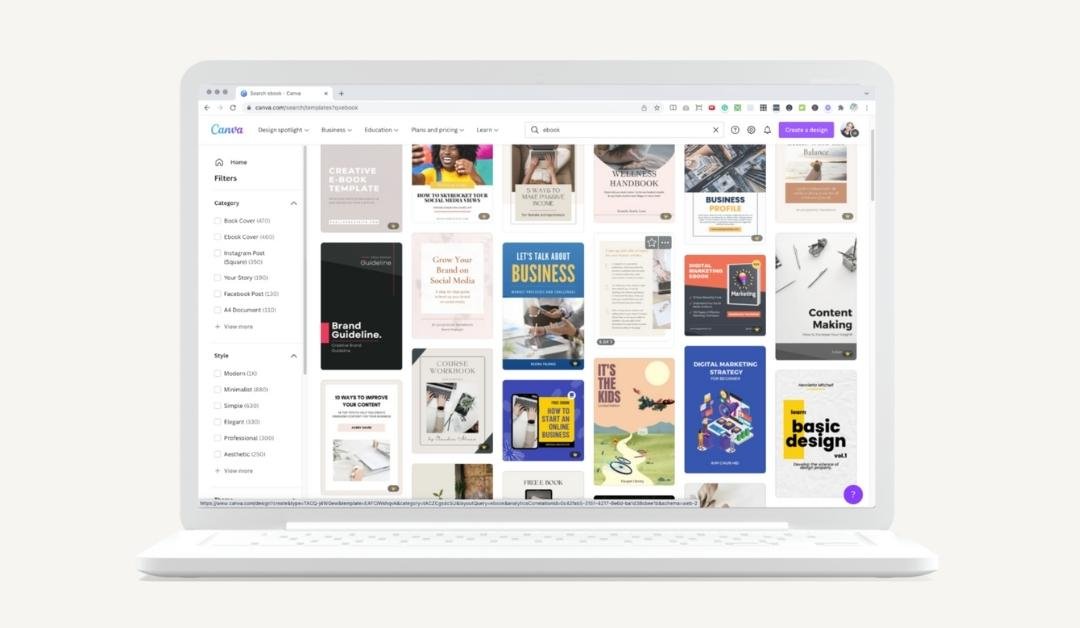
Look through all the different templates
Use the filter system to narrow your search! You can filter by “Style,” “Theme,” and “Color.” There’s also “Category,” but I don’t recommend it because the keyword has already filtered the correct Category.
Hover over each template to preview the pages
Click on a template to use it! A new window will open to edit the new project.
TIP: If you like more than one eBook template or want to combine a few. Click to open all of them, and I’ll show you a trick to combine them later.
Combine Multiple eBooks
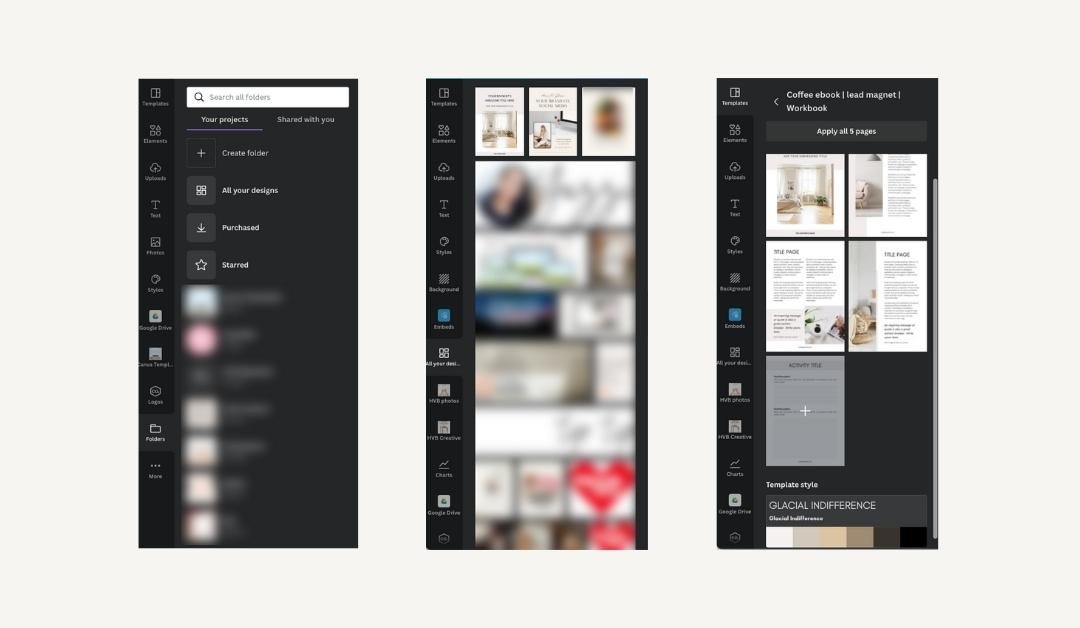
Now, this is a hack I use all the time.
Open the template with the bulk of the pages you want to use.
Go to the black Canva menu on the left-hand side > click “All Your Designs.”
The other eBook should appear > click on it > Add the individual pages of the other eBook into your main eBook.
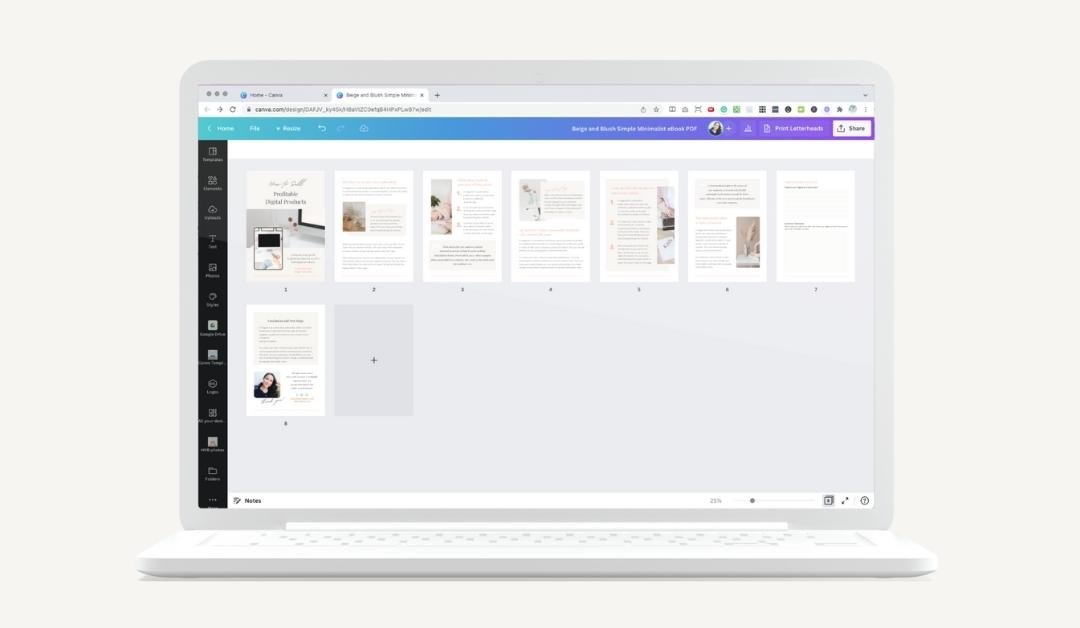
Format the eBook Pages
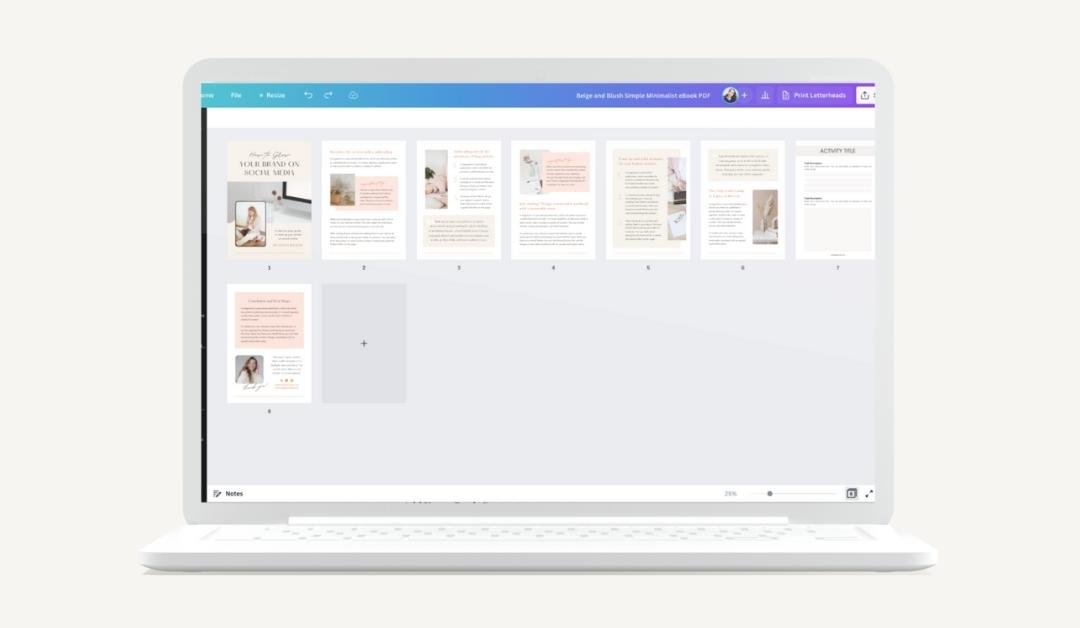
Now that you have all the pages in the eBook- it’s time to format your eBook!
Update the Fonts
Update the Colors
Edit the headers and footers of your eBook
TIP: Try to limit using dark colors as backgrounds. Although it looks great on PDF, if someone wants to print the document, they’ll use a lot of ink! It’s just not worth it! Let’s save ink people! It's expensive!
Add Your eBook Content
Now that you have an eBook that matches your brand- it’s time to add your eBook Content.
I don’t recommend writing your eBook directly in Canva because it’s super hard to edit and review grammar and spelling errors. That’s why you should always write your eBook in Google Docs!
Once you’ve edited and reviewed your final eBook in Google Docs, add it to your Canva eBook template!
Don’t forget to add
Page numbers (Canva isn’t like a Google Doc, Word Doc, or Apple Pages in that sense. So you can’t click a button to auto apply page numbers. Page numbers are added manually. WOMP!)
Add links. Don’t forget to test them either!
Super important to add Disclaimers like for copywriting or anything having to do with health-related information.
A What’s Next Page promoting your offers or services! Use a URL that won’t change or that can be redirected in the future.
Save the eBook as a PDF
Once you’ve updated your eBook, tripled checked all links, read it out loud, and printed it to make sure you’re not wasting too much ink, it’s time to download your eBook as a PDF!
Click Share in the top right corner and select Download.
Select PDF Standard or PDF Print from the dropdown.
Check Flatten PDF to tick the checkbox. Flattening it can help make sure your PDF downloads correctly.
Click Download. If you used paid elements, click Pay and Download.
Next Save it to your computer (I usually save it to my Google Drive)
How to Deliver the eBook
Yay! It’s time to deliver the eBook you created for free in Canva!
Now, where you take payment and where a product is delivered may be in two different tools, or it can be all in one place. It just depends on the tools you use in your business.
All In One Systems

If you use an all-in-one system like Squarespace, you will upload them directly into your store. (I used to do it this way.)
But something I hate about Squarespace is that the customer gets an email with a link to download, but the link expires after 24 hours. And it costs a lot of Customer service back and forth that I just didn’t have time for as a solopreneur!
And personally, if I buy something and the link expires after 24 hours, I’d be pissed. So I refrain from doing any business that I don’t like as a consumer.
Deliver Using Your Email service Provider
Because expiring links suck, I connected Squarespace with ConvertKit. If you have the Advanced Squarespace plan, you can connect it directly to ConvertKit, or you can use Make (aff) to connect Squarespace to most Email Service Providers. Then you can resend or send the eBook for the first time, using your ESP with a link that doesn’t expire.
Deliver In a Course Platform
Now, I use ThriveCart as my shopping cart to take payment, and ThriveCart Learn to deliver my eBook in a Course. What I love about this method is that as long as I never delete the course (or the Google File), customers will be able to download the file forever!
TIP: Alternatively, you can upload your PDF to Google Drive or DropBox, make the file shareable and send it via your ESP or add it as a link to your course.
Start Marketing Your eBook
Now that you have everything set up in your Sales Cart and you can deliver your product with ease, it’s time to start marketing your eBook!
Create a Marketing Plan
To stay focused during your launch, create a marketing plan that discusses
The problem your audience is having.
Features and benefits of your product.
Schedule Questions & Answers so your audience can ask questions directly.
Most importantly, share your excitement and why you created your product! It will hype people up too!
Create Promotional Assets
Depending on your marketing channels, you’ll want to create content for every channel you consistently use.
Create IG Stories
Create Reels & TikToks
Add it to the Instagram and FaceBook Feed
Create Pinterest Pins
Create YouTube Videos
Promote
Now, stick to your marketing plan and promote, promote, promote! Every day until you consistently make sales!
How to Create an eBook in Canva
That’s how to create an eBook in Canva for Free! There are really so many eBook templates that you can choose from! Get your Free Canva account and start selling your Digital Products so you can bring in passive income!
If you want to learn more about how to make $3000 from digital products, grab my freebie, just keep scrolling down below!
Are You On Pinterest?
If you enjoyed this post please share it, thanks!